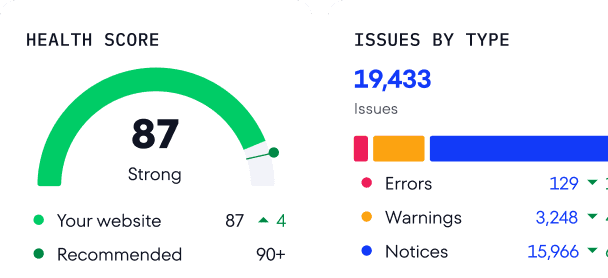
How to fix sitemap errors: Common issues & best practices
So you just created a sitemap and submitted it to Google but your sitemap status doesn’t show Success. Maybe your Sitemap report looks good, but after checking the Page Indexing report, you see that Google ignored your request and won’t index several of the pages from your sitemap. Now you’re wondering if there’s something you can do to improve your indexing stats.
Look no further because you’ll find all the answers in this post.
If you don’t have a sitemap and want to learn how to make one that shines, take our introductory sitemapping crash course. It covers the benefits of having a sitemap and presents several sitemap best practices. You’ll need to consult a guide anyway, especially if you don’t know what <loc> and <lastmod> tags are used for, or if you’re still unfamiliar with video sitemaps or sitemap index files.
The first part of this post lists all potential errors you may encounter in your GSC Sitemap report. If you’re working on troubleshooting specific issues, use our table of contents to jump to them.
The second half of this post features tips for making the most of your sitemap. It covers:
- How to find trash pages in your sitemap.
- Where to find missing pages in your sitemap file.
- How to encourage Google to index more of your sitemap pages.
Make sure to study the second chapter of this post carefully. The best practices outlined in this post are meant to help you improve your crawling and indexing process and raise your site’s visibility on Google.
All recommendations in this post are current as of November 2025.
Download to learn how AIOs changed after rollout and sign up to SE Ranking’s news and SEO tips digests!
Click the link we sent you in the email to confirm your email
-
After submitting your XML sitemap to Google, you may get a “Success” status. This means Google fetched it successfully and no errors were found. Other statuses indicate issues that need to be fixed.
-
Use the URL Inspection tool to diagnose problems preventing Google from fetching your sitemap file.
-
To access your website URLs when using sitemap index files, Google must successfully process all listed sitemaps. Avoid errors by ensuring all referenced sitemap URLs are fully qualified, excluding nested index files, and keeping the number of sitemaps under 50,000 per file.
-
To avoid Sitemap file size errors, keep your files under 50MB when uncompressed and limit them to 50,000 location URLs (not counting alternate language versions). While you can compress sitemaps to save bandwidth, ensure your sitemap isn’t empty and that it is free from duplicate URLs that add unnecessary bulk to the file size.
-
Google may be unable to crawl URLs in your sitemap for several key reasons: blocked URLs in robots.txt, URLs not accessible, URLs not followed, and URLs not allowed. Using SE Ranking’s Website Audit tool to monitor these issues is ideal because it has a dedicated section for sitemap errors.
-
Exclude low-quality pages from your sitemap: thin content and soft 404s (showing “200 OK” instead of proper error status). Use Google Analytics engagement metrics and the Page Indexing report to identify these issues.
-
When creating a sitemap manually, watch for syntax errors: use correct sitemap protocol, valid tag and attribute values, proper URL and date formats, include mandatory tags (urlset, url, loc, xmlns), and use correct namespace protocols for your sitemap type (news, video, image, hreflang).
-
Check the Page Indexing report to find out which pages Google indexes, and properly manage pages that shouldn’t be there (admin areas, duplicates). Ensure you’re not sending mixed signals with incorrect robots directives or canonical tags. Instead, provide clear signals to Google about the pages you want it to index.
Fixing Sitemaps report errors
After submitting your sitemap to Google, you can see if it successfully processed the file in the Status column. If your file follows all the rules, its status should be Success.
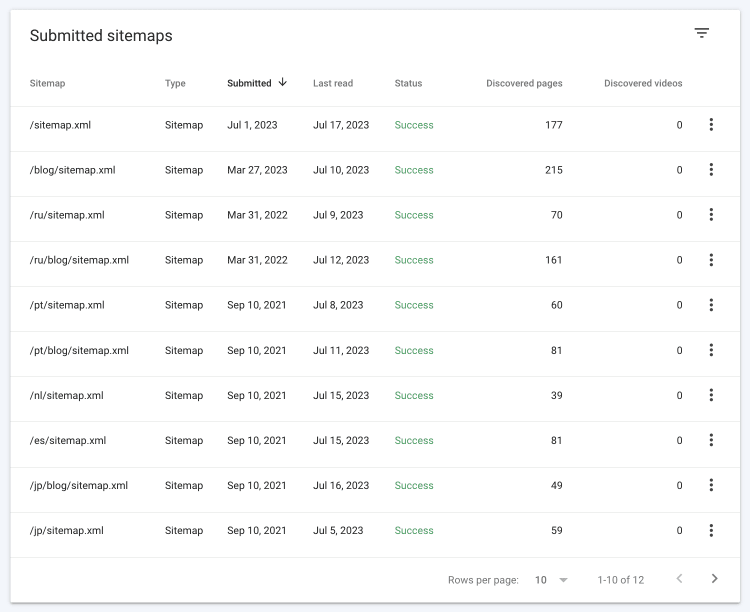
In this chapter, we’ll discuss two other status codes, namely Couldn’t fetch and Has errors.
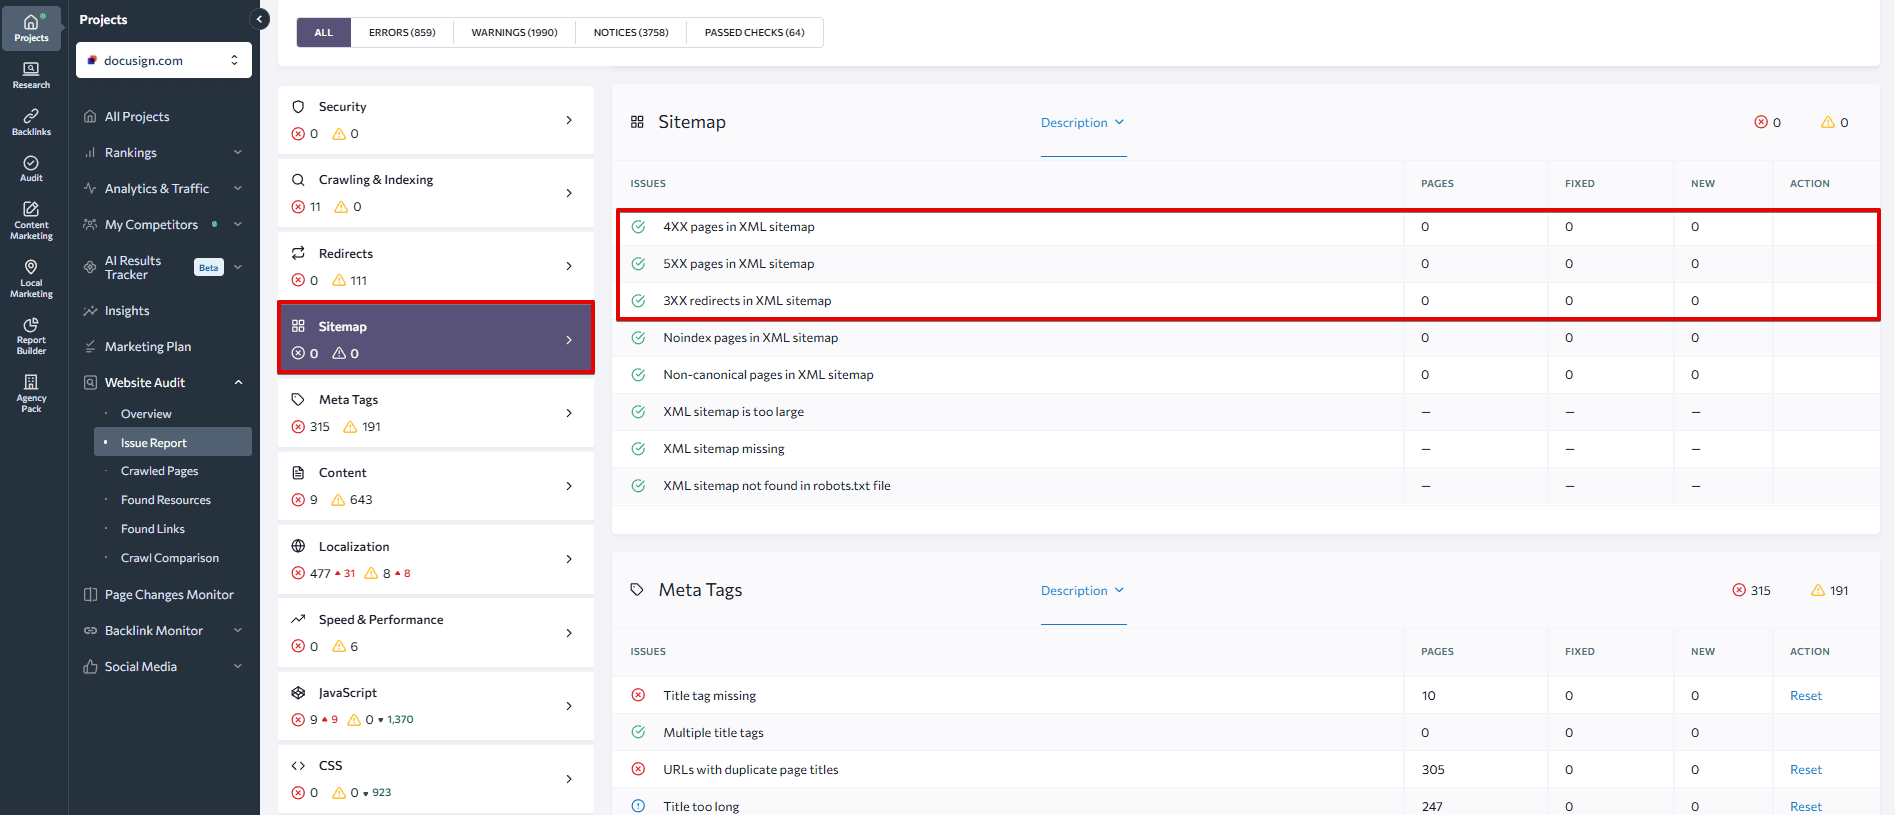
Quick note before we dive in: We recently introduced our new Website Audit 2.0, featuring a new Sitemap section. All sitemap-related checks are now organized in one place, making it easier to spot and fix issues that were previously scattered across different categories (like XML sitemap not found in robots.txt file, 3XX redirects in XML sitemap, non-canonical pages in XML sitemap, noindex pages in XML sitemap, 4XX pages in XML sitemap, and 5XX pages in XML sitemap). We also adjusted the priority levels of critical sitemap issues to better reflect their impact on website performance. Critical issues like XML sitemap is too large and Non-canonical pages in XML sitemap are now marked as Errors. The issue, 3XX redirects in sitemap, has been upgraded from Notices to Warnings. These changes are accurate as of November 2025.
Google has difficulty crawling your sitemap file
Let’s start with the most difficult scenario: Google can’t fetch your sitemap file. When this happens, you need to use the URL Inspection tool to find the source of the problem.
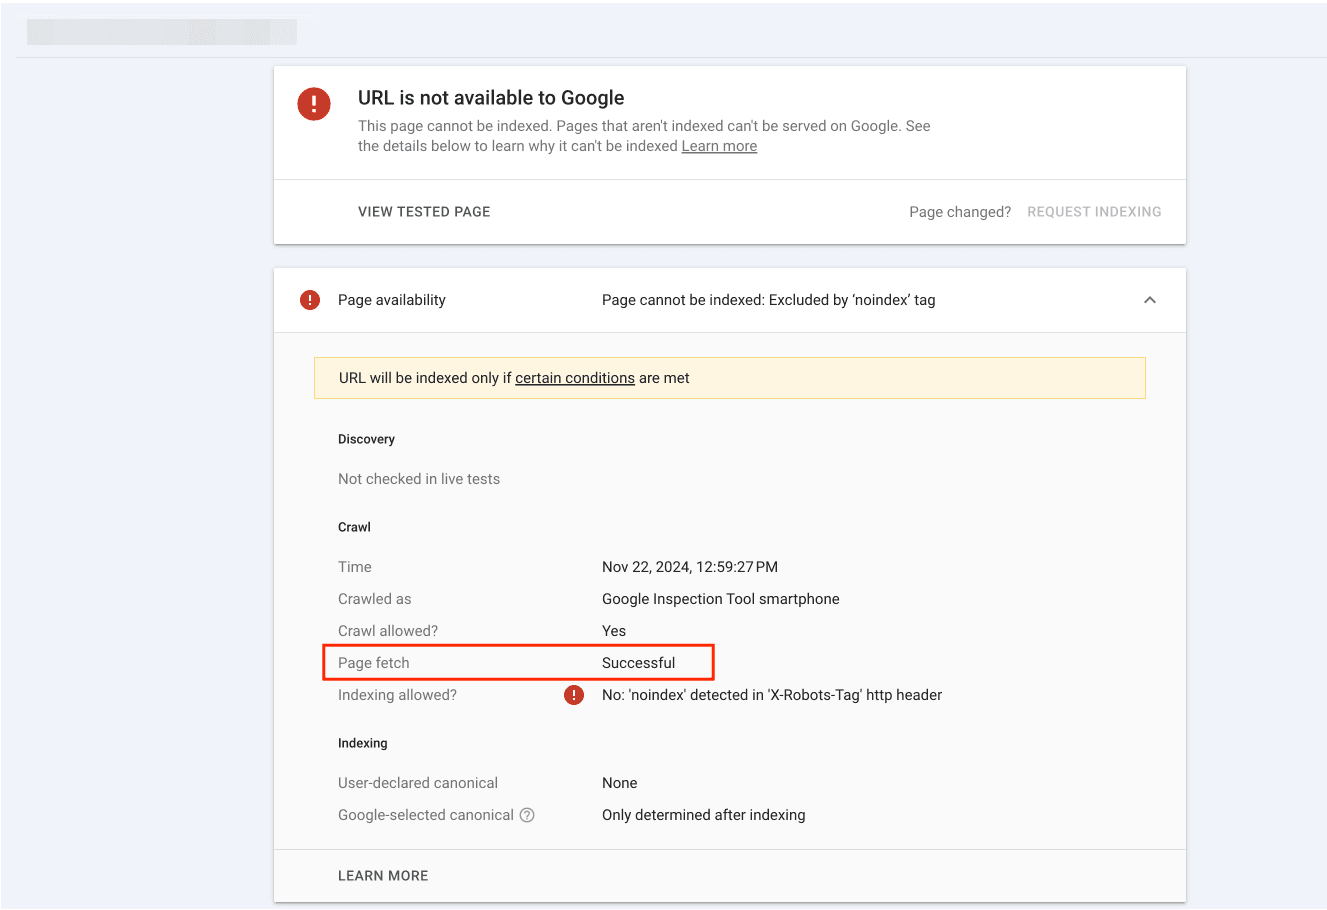
In the URL Inspection tool, click the Live test button and check the Page fetch status. If it says Successful, there must be a bug on Google’s side. Consider contacting Google Support if this happens.
When reaching out to Google’s support team and reporting the issue, provide them with relevant details, including the sitemap’s URL, any error messages encountered, or observations made. Google will provide step-by-step guidance to help you resolve the issue.
If there’s no bug on Google’s end and your sitemap can’t be fetched, make sure nothing is blocking Google from accessing your sitemap. Sometimes robots.txt directives or even CMS plugins are to blame. Also, make sure you’ve entered a proper sitemap URL while paying attention to protocol and www.
These techniques can be applied to both single and sitemap index files. Now, let’s look into ways to address the most common XML sitemap issues.
Sitemap index file errors
Google may occasionally detect XML sitemap errors while fetching your submitted file.
When using a sitemap index file to access your site’s URLs, Google must process all separate sitemaps listed in it. If Google fails to process the URLs listed on the sitemap index file, you may receive an Invalid URL in sitemap index file error. This normally means that incomplete URLs or typos are stopping Google from finding one or more of your sitemaps. Google cannot find your URLs unless all individual sitemaps in your sitemap index file are fully-qualified.
Your sitemap index file also shouldn’t list other sitemap index files, only sitemaps. But if you decide to list them, you’ll get an Incorrect sitemap index format: Nested sitemap indexes error.
The last error we’ll look at is Too many sitemaps in the sitemap index file. This can occur when huge websites list more than 50,000 sitemaps in a single file.
Sitemap size and compression errors
Size restrictions apply both to sitemap index files and individual sitemaps. Sitemap file size shouldn’t exceed 50 MB when uncompressed. The file also shouldn’t list more than 50,000 location URLs (not counting alternative ones). If you fail to adhere to these recommendations, you’ll get a Sitemap file size error. As of November 2025, these limits remain unchanged in Google’s official sitemap protocol.
Read our ultimate sitemap guide to learn how to split sitemaps into several sitemap files.
It’s important to understand how Google counts URLs when including localized versions of pages in your sitemap. According to Google’s John Mueller, Google considers only the <loc> positions as individual URLs in a sitemap. This means that even if you have multiple xhtml:link positions for different language versions of a page, they will be counted as one URL in terms of sitemap size limitations.
Another thing you should be aware of is that Google counts duplicate <loc> URLs as one in sitemaps. Google may not consider this as a sitemap error, but you should still keep your sitemap clean from duplicates. Duplicates won’t help Google index your website faster, and instead can add clutter and increase the sitemap XML file’s size.
While your sitemap shouldn’t be huge, it also shouldn’t be empty. Submitting an Empty sitemap will result in an error.
Also, earlier on in this article, we mentioned that the sitemap size should be less than 50 MB when uncompressed, but it is a common practice to compress sitemaps to save bandwidth. A commonly used tool for this purpose is gzip, which adds the gz extension to sitemaps. If you get a compression sitemap error in the GSC report, this means something went wrong during the compression process. Your best bet is to try again.
Google cannot crawl your sitemap’s URLs
There are several reasons why Google may not be able to crawl URLs listed on your sitemap. Let’s look at some of the most common ones.
- Sitemap contains URLs that are being blocked by robots.txt. This sitemap error is a pretty clear one, especially since GSC will point you to each blocked URL. Depending on whether you want to index these URLs, you’ll have to either lift the block or remove them from your sitemap.
Other sitemaps report errors, such as URLs not accessible, URLs not followed, and URLs not allowed are not that obvious. Let’s briefly go through each of them.
- The URLs not accessible error means that Google has found your sitemap at the designated location but couldn’t fetch some of the URLs on your list. When this happens, use the URL Inspection tool. The procedure is the same as when Google can’t fetch your sitemap at all.
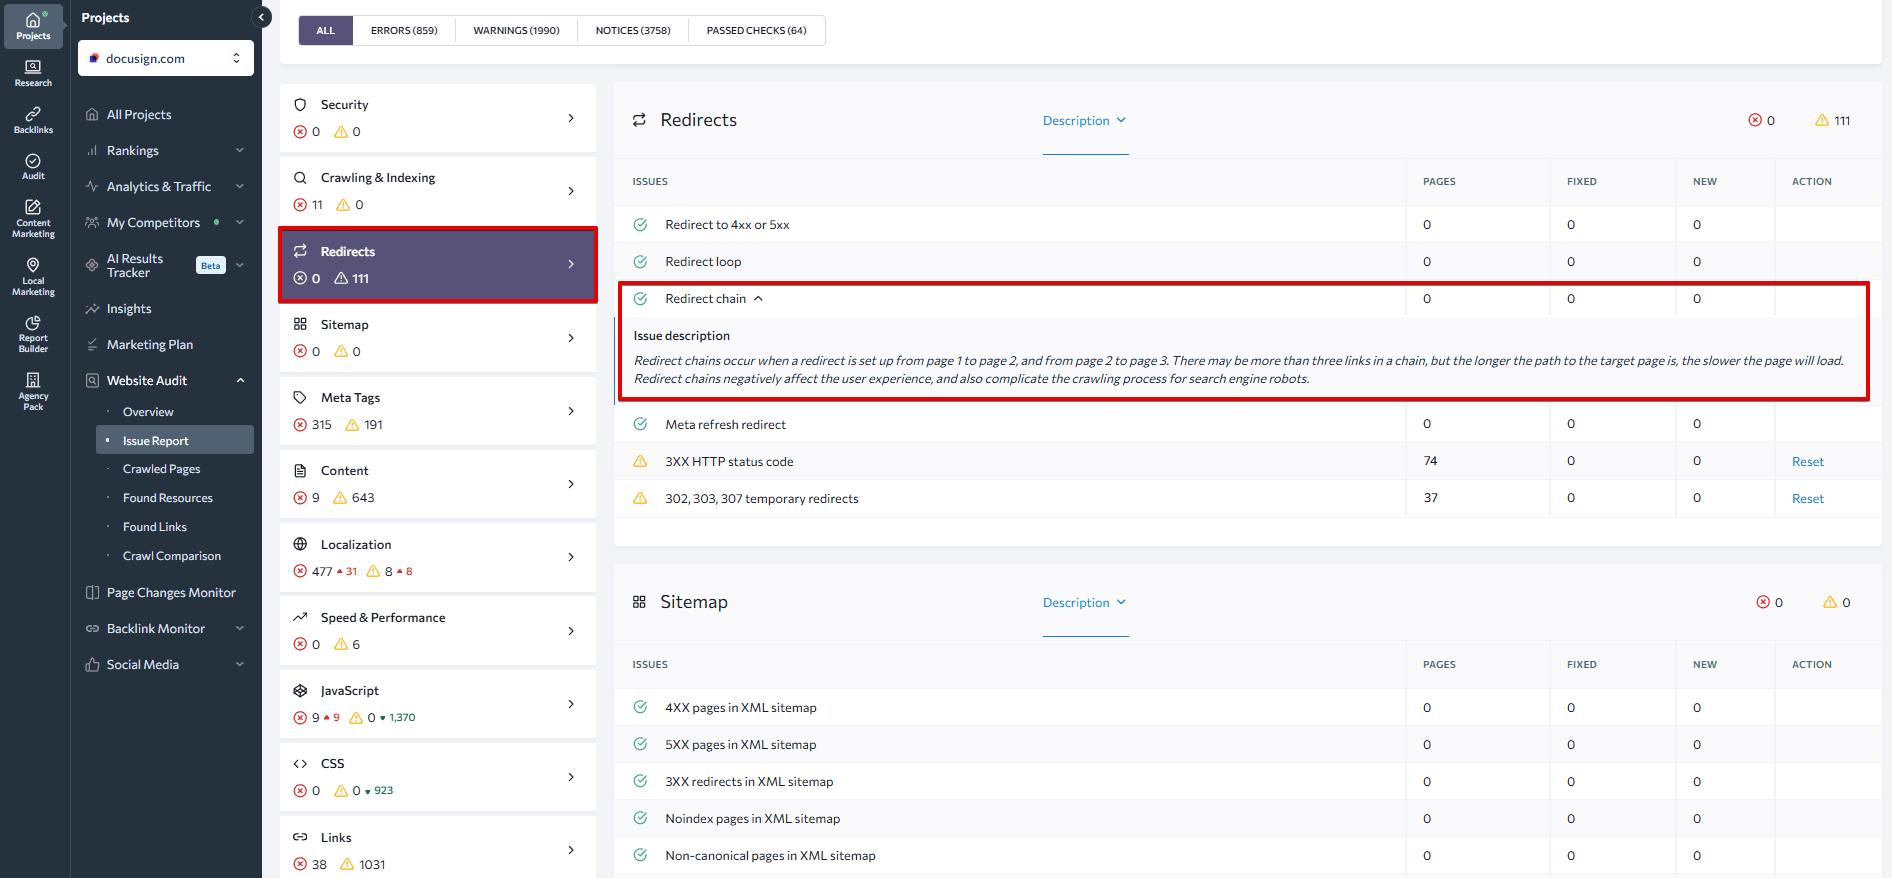
- The URLs not followed error occurs either because you used relative URLs on your sitemap instead of fully-qualified URLs, or because of redirect issues. Some activities capable of leading to these errors include redirect chains and loops, temporary redirects used instead of permanent redirection, and HTML and JS redirects.
Try not to keep redirected URLs in your XML sitemaps for longer than necessary.
Although including redirected URLs in the sitemap can be a useful strategy for some scenarios, it has limited impact. Periodically review and update your XML sitemap to ensure it includes relevant and current URLs.
Google Search Console will not specify the exact cause of the problem, so you’ll have to use other tools to dig out potential issues. For example, the Site Audit by SE Ranking has a dedicated Redirects section to help you check your website for redirect problems.
If the tool finds issues, you can access all key information on each sitemap error. Just click on the number indicating how many pages were affected. This will ensure that you know which page features an error and how it is linked to other pages of the website.
- The URL not allowed error indicates that your sitemap features URLs at a higher level or on a different domain than the sitemap file itself. For example, if your sitemap is located at yoursite.com/category1/sitemap.xml and you’ve added a page to it that is located at yoursite.com/page1, Google cannot access that page.
Speaking of different domains, be cautious as Google treats HTTP and HTTPS, as well as www and non-www versions of your site, as distinct entities. If you recently switched to any of these, make sure to generate a new sitemap.
SE Ranking’s Website Audit tool will also warn you when these instances happen.
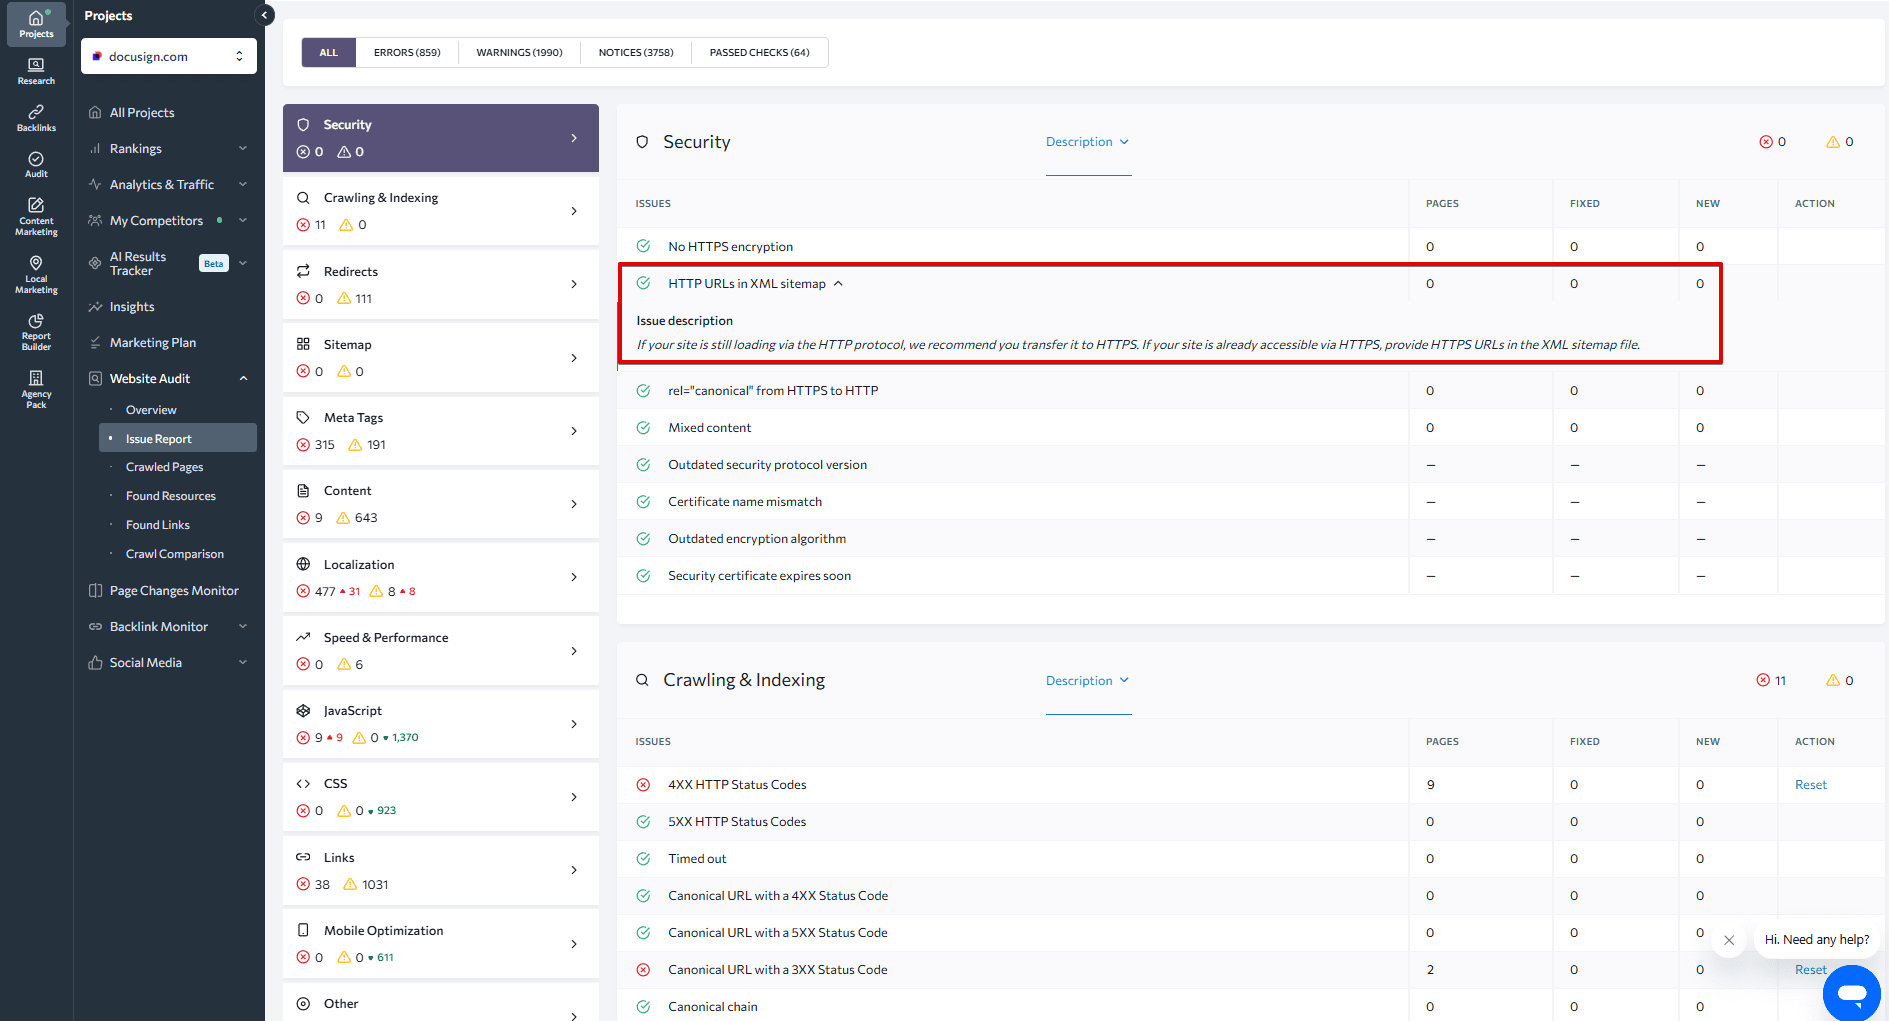
- Finally, there’s one more thing that can prevent Google from crawling a page—an HTTP non-200 status code. This error is labeled as HTTP error in the GSC report, and the exact sitemap error code is specified for each instance. You can find all key information in the Sitemap section of SE Ranking’s Website Audit.
Google suspects you’ve listed the wrong URLs
Do not include thin content or soft 404 pages when managing your sitemap as it can negatively impact your website’s SEO. Here’s why:
- Thin content refers to pages that offer limited or duplicate content, providing little value to users. To address this issue, conduct both manual reviews and data analysis to identify pages lacking substance or quality. For example, you can use Google Analytics to spot pages with low engagement rates and minimal traffic, as they may be candidates for thin content. Once identified, you have three options: noindex these pages, improve their quality through content rework, or remove them from your website entirely.
- Soft 404 pages return a “200 OK” status code instead of a “404 Not Found” status, misleading both search engines and users. To identify these pages, go to Google Search Console’s Page Indexing report, where soft 404 pages will be listed among the pages not indexed by Google. Review these pages closely and then take appropriate action. If the page truly doesn’t exist, set up the correct 404 or 410 error status to indicate its absence. On the other hand, if the page does exist and you want Google to index it, focus on enhancing its content and then resubmit it for indexing.
Syntax-based sitemap errors
You typically won’t have to worry about syntax-based sitemap errors if you generate a sitemap with a special tool that handles tags and attributes properly. On the other hand, you may encounter one of the following issues even if you created your sitemap manually:
- Invalid tag value. Tag value is what you put between the opening and closing tag, including the URL between the <loc> tags, and the date you indicate with the help of <lastmod> tag. An error may occur when you put an unacceptable value or data format in your sitemap.
- Invalid attribute value. The attribute value is what you indicate after an equal sign (=) within quotation marks. For example, the string of code below lists different language versions of a page in the sitemap:
<url><loc>https://example.com</loc><xhtml:link rel=”alternate” hreflang=”gb” href=”https://example.com”/><xhtml:link rel=”alternate” hreflang=”fr” href=”https://example.com/fr”/></url>
Here, “alternate”, “gb” and “fr” are attribute values, but “gb” is the wrong one because you cannot indicate just the country code in hreflangs. Instead, it should be paired with a language code, as in “en-gb.”
- Invalid URL. This error suggests that you should be looking for typos in your listed URLs. Make sure all the URLs in your sitemap are fully-qualified.
2005-02-21
2005-02-21T18:00:15+00:00
- Missing XML attribute and Missing XML tag errors are rather clear as well. Leaving out mandatory tags and attributes (<urlset>, <URL>, <loc>, “xmlns”) is not an option—you need to list them to let your sitemap function properly.
- Invalid XML: too many tags. This error would occur if you use one of the tags multiple times, e.g. you list two different URL locations or two different modification dates for a single URL. Thus, you’ll have to remove the duplicate tag.
<url>
<loc>http://www.example.com/</loc>
<lastmod>2021-01-01</lastmod>
<lastmod>2021-02-01</lastmod>
<changefreq>monthly</changefreq>
<priority>0.8</priority>
</url>
- Incorrect namespace. The namespace listed within your <urlset> tag should be one of the accepted protocols. Currently, the following protocols are used:
| News sitemaps | xmlns:news=”http://www.google.com/schemas/sitemap-news/0.9″ |
| Video sitemaps | xmlns:video=”http://www.google.com/schemas/sitemap-video/1.1″ |
| Image sitemaps | xmlns:image:=”http://www.google.com/schemas/sitemap-image/1.1″ |
| hreflang sitemaps | xhtml:hreflang:=”http://www.w3.org/1999/xhtml” |
- If you used the wrong protocol for your sitemap, you’ll get the Unsupported format error. This error can also occur due to various syntax errors, such as using incorrect quotation marks (only straight single or double quotes are accepted) or missing the encoding tag.
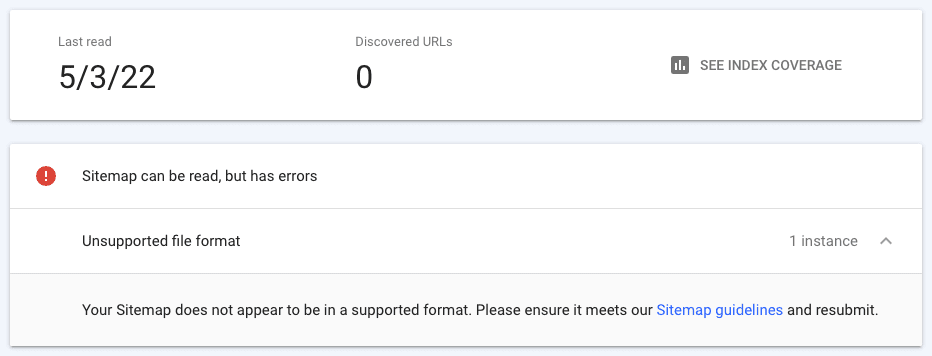
There are also several video-sitemap-specific errors: Thumbnail too large/small, Video location and play page location are the same, Video location URL appears to be a play page URL. Find more details on these errors here.
To ensure your XML sitemaps are accurate and structured properly, you must know how to prevent syntax errors and common sitemap mistakes. One of the most convenient ways to accomplish this is through the use of XML sitemap validators, like this one. Tools like these will generate a comprehensive report, highlight problematic sections or lines of code, and provide you with valuable insights on how to fix common sitemap errors.
Once you have fixed all sitemap errors mentioned in your GSC report, resubmit your updated sitemap with a new request. Open the Sitemaps report in Google Search Console, add your sitemap URL to the Add a new sitemap box, and click Submit. For minor updates, let Google follow its regular crawling schedule.
To learn the ins and outs of website indexing, read this complete guide.
Balancing the submitted URLs vs indexed URLs ratio
Even if your sitemap or sitemap index file status says Success, that doesn’t mean your work is complete. Click the See Page Indexing button next to the number of discovered URLs to go to the respective report. You may begin investigating it only to discover that not all of the pages you submitted were indexed.
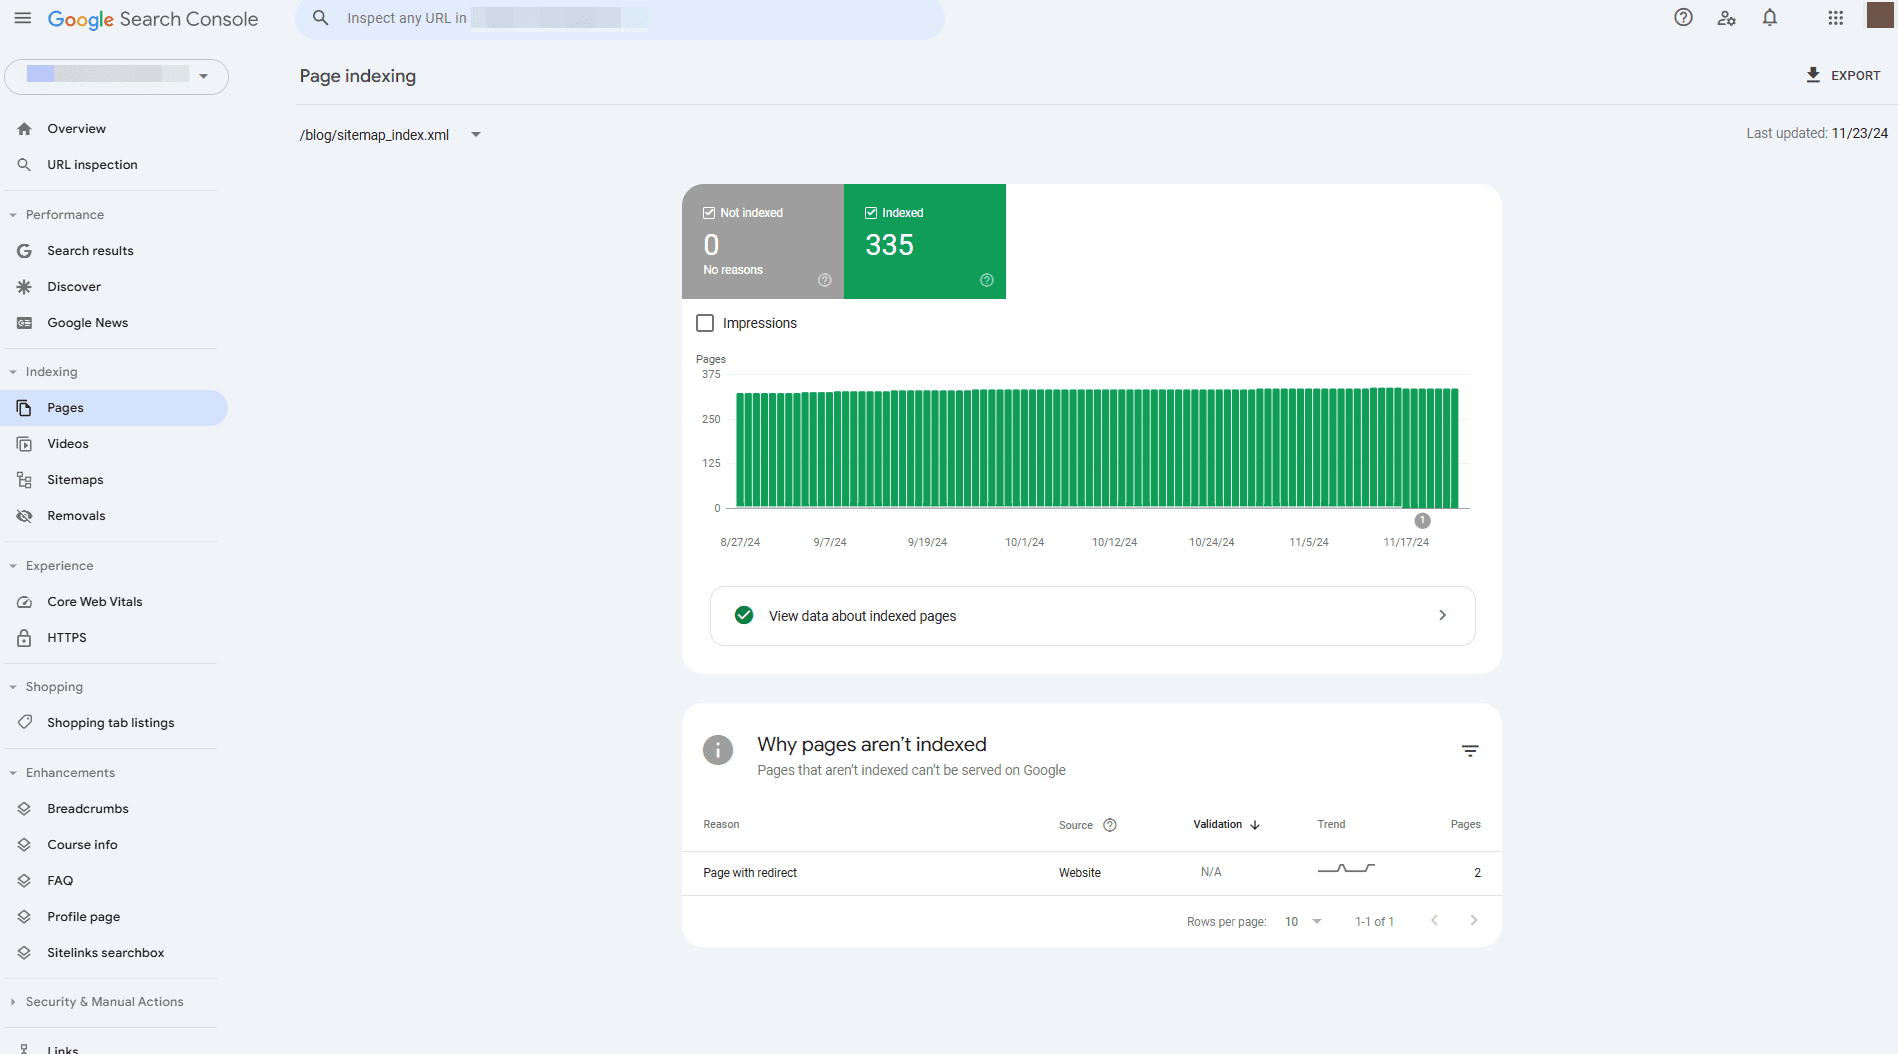
When monitoring the indexing status of your website’s pages in Google Search Console, you can use the sitemap filter feature, which makes switching between sitemaps and page categories easy.
To access this feature, navigate to the Page Indexing report in Google Search Console, select the Sitemap filter, and then choose the category or sitemap to examine. This is where you can view the following reports:
- All known pages: Includes all pages discovered by Google.
- Submitted pages: Lists pages submitted via your sitemap.
- Unsubmitted pages: Highlights pages that Google has found but were not submitted via your sitemap.
It’s common and considered good practice to exclude pages from indexing. This is because Google cannot like and index all of the pages on your website. Many websites have pages that webmasters don’t want to index, such as admin areas, utility pages, duplicates, and alternative pages.
If Google is not indexing your pages, it’s likely because you added pages that shouldn’t be on your sitemap. Google may not be able to index and crawl the page because of a noindex directive, or Google may be unsure about whether you want the page indexed or not, such as when you add non-canonical pages to your sitemap. Each of these instances can be found in different tabs of the GSC Page Indexing report, but it’s more convenient to check them using SE Ranking’s Website Audit tool, which will show any crawling issues in the Sitemap section of the Issue report.
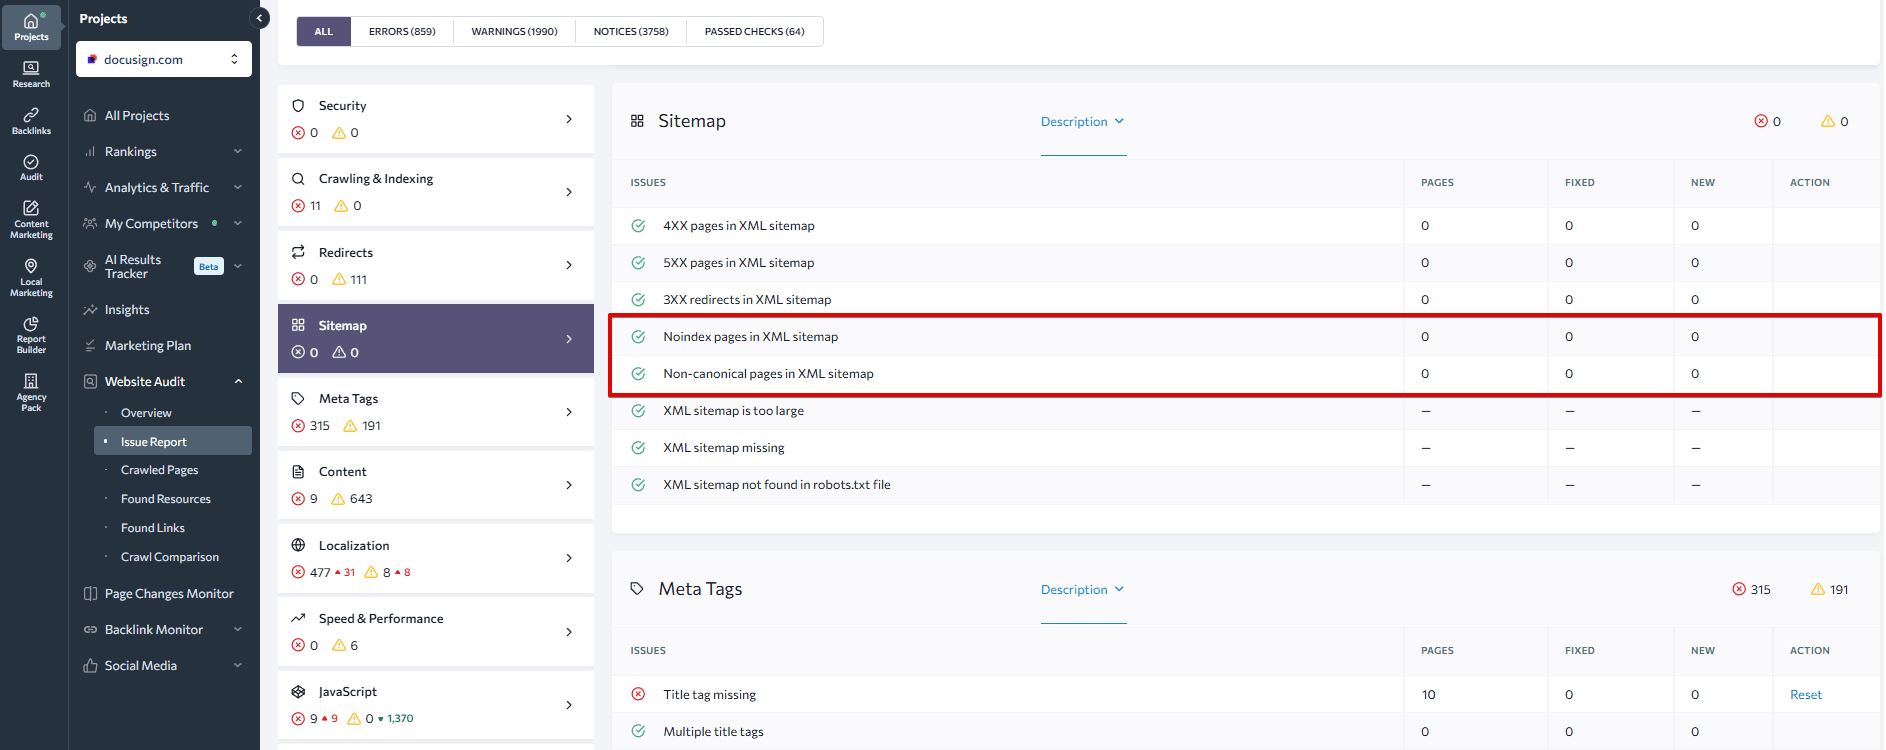
To resolve the non-indexed pages issue, remove noindex and non-canonical pages from your sitemap. Alternatively, if the pages were marked as noindex and non-canonical by mistake, fix the wrong tag issues to enable proper indexing.
Once you’re sure your sitemap is not sending confusing signals to Google, go through the Page Indexing report to find instances where you and Google disagree on the value of a page.
- In the Indexed tab, you can discover pages that Google has successfully crawled and indexed. To access this list, click View data about indexed pages below the chart on the summary page of the report. This report only lists 1,000 URLs, so not all pages may be included. For more detailed data on a specific URL, select it from the list or add it to the search bar at the top of the page and click the Inspect URL button. This will provide additional insights into how Google perceives and treats that URL.
At the bottom of the page, you’ll find the Improve page appearance section, which presents indexed pages that could benefit from enhancements. Pay close attention to pages that were indexed despite having a noindex directive. In such cases, Google’s judgment is likely accurate, and you should consider removing the noindex tag from these pages or reviewing your X-Robots tag settings. You may want to add these pages to your sitemap, as Google believes they are high in quality. You should also watch out for duplicate pages that were indexed but not present on your sitemap. This generally happens as a result of poor pagination and parameter handling. - In the Not Indexed tab, you’ll find pages that Google couldn’t index due to various reasons, including the appearance of indexing errors or intentional exclusions. This might show up as pages blocked by robots.txt, old 404 pages, or pages with noindex or canonical tags.
The reasons for URLs not being indexed are listed in the Why pages aren’t indexed table. It displays the status, source, and number of affected pages. Take the time to thoroughly review each case. Pay particular attention to canonical pages that Google chose not to index, as the search engine may believe there are better alternatives on your website. If Google’s assessment is correct, consider fixing your canonical tags. If you still believe the page should be indexed, focus on improving its content, backlink profile, and internal linking to convince Google that it is more valuable than other options.
After resolving the issue, you can inform Google and request validation of the fix by clicking the button provided in the issue report.
It’s recommended to take a closer look at all of these pages and then see what you can do; either increase their value if they should be indexed, or provide Google with more distinct signals for pages that are unwanted in its index.
Conclusion
Fixing sitemap errors is a crucial part of an effective website crawling and indexing strategy. We hope this guide helped you fix common XML sitemap errors on your report. Another important aspect to remember is that your sitemap should include only pages you want Google to index. We recommend only keeping juicy, high-quality pages on your sitemap while removing all pages that may give a bad impression on search engines. If you have any remaining questions, don’t hesitate to reach out to us via our live chat or get in touch with us on Facebook.
