How to migrate a website successfully
Website migration can be a risky business, but it has to be done sometimes. You can do it in-house or hire an agency or contractor offering migration services. In both cases, though, you need to understand how this process works to ensure it runs smoothly.
This step-by-step guide will show you how to transfer a website to a new domain and provide you with a site migration SEO plan. You’ll also get a website migration checklist and pro tips on how to avoid SEO mishaps and minimize consequences.
Key Takeaways
- Before migrating, establish clear goals, audit the existing site, and prepare a detailed migration plan.
- Choose and check the infrastructure or domain you want to migrate your website to.
- Back up the old website: save your content, links, media, files, etc.
- Create a comprehensive redirect map to send users from old URLs to new ones.
- Ensure elements like server configuration, DNS adjustments, and content management are handled correctly.
- Test the new site thoroughly in a staging environment to catch any issues.
- After going live, monitor traffic, crawl rates, and indexation to ensure stability and resolve any emerging issues.
What is website migration?
Website migration refers to moving a website from one infrastructure or address to another.
You can move a website without changing its URL address or domain name by switching it to a new host provider or content management system.
You can also change a site’s address during website migration in one of the following ways:
- Changing the site’s protocol: For instance, from http://www.sitename.com to https://www.sitename.com
- Changing the site’s domain name: For example, from sitename.com to sitename.net or sitename.com to sitenewname.com
- Changing the site’s URL path: For instance, from sitename.com/page.php?id=1 to sitename.com/blog
Important note: Website migration doesn’t mean changing your page layout and design, or making your website architecture and experience more user-friendly. This process is called site redesign.
In this article, we’ll focus on the second type of migration—migrating a website with visible alterations to its URL address. The main cases when website owners should consider such a move are when their old domain is no longer relevant (it doesn’t match the business, is too long, or the company name has changed) or when they want to scale their business and change the website’s domain zone. This type of migration is more complex and requires thorough planning.
Does site migration affect SEO?
Yes, website migration can affect SEO. In fact, any significant change to a website can impact its SEO performance. The migration’s degree of complexity dictates how much of an effect it will have on its SEO.
Even if the migration is successful, you may still see a temporary decrease in organic traffic to your new site. This is absolutely normal because the traffic from your old site can’t just instantly move to the new one. The same applies to rankings. Google will need some time to transfer the positions from your old site to the new one.
But if you don’t handle migration properly, the scale of these problems can increase.
Having a good plan and knowing what steps to take can ensure a smooth migration with limited damage to your SEO. This is where a comprehensive SEO tool can help.
In fact, one of our partner agencies used SE Ranking’s toolset to migrate their client’s site, and the results were a resounding success. Check out our case study on it here to get insights for crafting a successful migration strategy of your own.
Preparing for the site migration step by step
Whether you’re planning a big site migration with thousands of pages or a simple one-page site move, you’ll need to prepare the move step by step. The more detailed your plan is, the less likely your traffic will drop significantly or other problems will arise. And even if this happens, the recovery may be less time-consuming and painful.
Operational planning
Treat site migration like a project. To do it successfully:
- Draw up an action plan: Determine the most important and major changes you’ll need to make and plan out when to move the site. Observe how your traffic changes over time and schedule your migration for a time or day when traffic is at its lowest.
- Calculate website migration budgets: List the resources you’ll need and calculate all possible expenses for the duration of the project.
- Analyze site migration SEO risks: Think about potential issues that could put project implementation at risk and how to mitigate them, extend deadlines, or increase costs.
- Gather a team: Consider the specialists you’ll need, such as developers, SEO experts, and server administrators, etc. As with any project, you’ll need a project manager to oversee the site migration process, manage the team, ensure deadlines are met, and deliver positive results.
Checking the new domain first
When considering migrating your site to a new domain, choose it carefully as it will play a critical role in your website’s future.
There are two possible options when choosing a domain:
- Go for a completely new domain that no one has used before. This means you’ll need to start from scratch and optimize the site all over again.
- Select a domain with a history, previously owned by someone. In this case, your site may be affected by the domain’s background. A positive background can help you recover faster, while a lousy one can ruin your site’s reputation.
It’s vital, then, to analyze the new domain’s performance, check its backlink profile and anchor texts, and investigate its history before buying it and migrating your website to it.
There are also several site migration tips and tools that you can use to ensure that your new domain isn’t hiding any skeletons in its closet:
- Wayback Machine. Go to http://web.archive.org/ and enter the domain name into the search field. Choose the date when the Wayback Machine scanned it, and you will be able to see what it looked like on that date and the content posted.

- Complete DNS. Go to https://completedns.com/dns-history/ and view domain drops and nameserver changes.

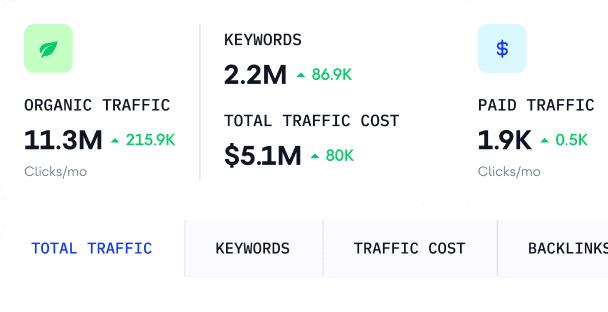
- SE Ranking. Go to Competitive Research tool to check keywords that the domain ranked for in organic and paid search, ranking dynamics, referring domains and backlinks, Domain and Page Trust scores, and much more.

- Google Search Console. Analyze the Manual actions report to check for any penalties on the new site and Removals to detect deleted URLs inherited from the previous owner.
Website migration checklist
Once the preparation stage is over, it’s time to start the actual move of your website. The following infographic will help you visualize what needs to be done and in what sequence.

Now, let’s go over this site migration SEO checklist and its stages in more detail.
Copy everything from the old site
Back up all website files, content, and media to avoid losing valuable data. Copying all of your data and saving it will ensure that you have all the vital information available and can restore your old website if necessary.
There are several ways to copy your old website and its content:
- If you’re running your website on WordPress, use WordPress plug-ins like All-in-One WP Migration, Duplicator, or UpdraftPlus.
- Do it manually, using FTP (File Transfer Protocol) software like FileZilla. However, remember that manual copying is complex and time-consuming.
- Use the control panel. One of the most popular control panels is cPanel, so your website is most likely using it, too. Its Backup Wizard will help you make partial backups. Even though this is still considered to be a manual approach, it’s much easier to implement.
- Sign up for a third-party website backup service that will do everything for you.
With a basic understanding of the backup process, you can manage it and ensure that everything is prepared for smooth site migration.
Launch your website on a new domain
The next step in our site migration checklist is to paste the content you copied into the new website. This stage involves several important details:
- The instruments we mentioned earlier that can back up your website can also paste data to your new website.
- If you’re moving to a new server, alter your DNS settings so they point to the new IP address.
- If you’re keeping your old server, adjust the environment variables to the new domain and configure the server to the new URLs.
- Configure the SSL certificate. This digital certificate authenticates the website and provides an encrypted connection between a web browser and a web server. This is a 100% must-have to increase users’ and bots’ trust.
During migrations, it’s advisable to prevent search engines from indexing your new site’s pages and content to avoid competition with your old one. You can do this by adding relevant detectives to your robots.txt file.
You have several options here:
- Disallow all bots from indexing your website
User-agent: *

Disallow: /
- Disallow particular bots from indexing your website
User-agent: Googlebot
Disallow: /
If you choose one of the above options, remember to provide access to the necessary tools, such as the SE Ranking bot, which may be required for conducting a website audit during the site migration. In this case, the directive will look like this:
User-agent: Googlebot
Disallow: /
User-agent: SEBot-WA
Allow: /
Create a page redirect map
- Help site visitors and search bots find pages that changed their URL addresses.
- Make it easier for search bots to discover and index new URLs.
- Show the connection between the old and new websites’ pages.
Again, properly configured redirects are critical for website migration and SEO success because they can help your new website inherit the traffic and rankings of the old one without incurring any significant drops.
During our recent webinar on AI-driven redirect mapping, Mark Williams-Cook, Director at Candour and Founder of AlsoAsked, shared how to use AI to automate and optimize the redirect mapping process. Here are the step-by-step instructions that you can follow:
- Locate all the page URLs
Audit your old and new website with SE Raking’s Website Audit tool. You have two options here:
- Create two separate projects and run checks. This way you can track the performance of these websites, including rankings.
- Audit your websites without the project creation stage, using a stand-alone version of the Website Audit tool.
Then, go to the Crawled Pages section and filter URLs for 200 status codes. Export data in CSV format and name the file “origin.csv”. Repeat the steps for your staging website to include it as a comparison. The file should be named destination.csv.

- Adjust the URLs in your files
Your staging site is likely hosted on a different subdomain or top-level domain, or the address differs significantly from the live site’s address. To avoid difficulties later on, use the Find and Replace option on your destination.csv.
Open your destination.csv file and locate all test URLs requiring address changes. To do this, navigate to Edit ▶️ Find & Replace or press Ctrl/Command + F on your keyboard. Then, input the domain addresses of both the staging and live sites, as depicted in the screenshot, and click the Replace All button.

Here’s how the file should look:

- Apply script in Google Colab
Find the script written by Daniel Emery, SEO consultant and founder of Perth SEO Agency at this link. Work through the script to convert everything into numbers and compare those numbers and vectors.
Go to Runtime at the top and click Run All.

Wait for all the code blocks to run and then upload the origin.csv and destination.csv files to Google Colab. To do this, scroll down.

Choose parameters to use for similarity matching. This helps the system determine which of the new website’s pages match the ones on the old site. Click Let’s Go!

Once Google Colab is finished running the code, it automatically uploads the output.csv file to your desktop. Open your output.csv file to view the origin and matched URLs in the corresponding columns. In the last column, you’ll find a Similarity score (how closely the URLs and other metadata match). A score of 1 means the pages of the old and new website are identical, indicating that the system has correctly identified their counterparts on the new site. Sort this column from the highest score to the lowest.

- Decide what redirects to apply
Pay attention to the pages below with a poor score. The lower the number, the higher the likelihood of a mismatch. If this occurs, manually adjust the pages or delete the corresponding rows from the table. The system likely will not give you a 100% correct match in the table. Perform a self-check to ensure accuracy.
From here, you get an idea of how and where to redirect pages. Consider the following ground rules:
- If your site migrates to a different domain or switches from HTTP to HTTPS, use 301 redirects to match old and new pages together. Doing this will allow search bots to index the new URLs and send ranking signals to them.
- If there is no suitable page on the new site to redirect from the old one, avoid redirecting to the homepage. Too many redirects to irrelevant pages are terrible for UX and SEO. Google will perceive these pages as soft 404s, potentially lowering your rankings. Redirecting the old page to the parent category page or to a relevant page in a different language would be a better option.
- If there is no page on the new site to redirect from the old one, and you don’t plan to create one, reset the 404 code (Not Found) to 410 (Gone) to indicate that the page has been permanently deleted.
- Review already existing redirects before adding new ones, as this can cause a redirect chain. For instance, Page A on the old site may already be redirected to Page B. If you redirect page B to page C while creating the map, it creates a chain of redirects from A to B to C. To avoid this, change the existing redirect and create a new one to send pages A and B to page C separately (A to C and B to C).
Set up redirects
At this stage, you’ll need to begin transforming the redirect map into actual redirects.
There are several ways to implement redirects:
- Use plug-ins for WordPress sites like Redirection to create and manage redirects. If you’re already using other plugins for WordPress, check if they have built-in redirection features. For instance, Yoast SEO Premium does.
- Google recommends using server-side redirects because they work faster. The process depends on the server you use. If you’re using Apache, you’ll need to edit your .htaccess file and add redirect directives. If you’re using NGINX, edit the .conf file.
Check all internal links on the new site
Be careful not to break internal links during the site migration process. It’s especially critical if you make site structure changes during migration.
When migrating a site with updated URLs, it’s important to update all internal links to point to the new URLs. This helps prevent 404 pages and website disruptions.
You can use SE Ranking’s Website Audit to find all of the internal links on your website and make sure they are in line with your SEO strategy. Navigate to the Found Links tab and choose Internal. This section will provide you with a list of internal links, along with the following important SEO parameters:
- Status code
- Link type (hyperlink, HTML, image, CSS, JS)
- Link attributes
- Anchor text and type
- Source URL

As part of your internal linking audit, it’s important to check that all internal links are working properly and that there are no links from the old site that may cause errors or disruptions. To do this, filter internal links by source URL. Go to Filters, choose Source URL, and enter your old website’s address. This will allow you to quickly identify any internal links that need to be updated or removed.

Set up new robots.txt and sitemap.xml
The next step in our domain migration checklist is updating your robots.txt file and opening your new site’s pages for indexing. You can unblock all the pages that you want the search bots to find, except for those that should be restricted on purpose.
To open your pages, use:
User-agent: *
Disallow:
When checking the robots.txt file, you should also pay equal attention to the following aspects:
- The robots.txt doesn’t prevent search engines from crawling files, images, JavaScript, and CSS resources on your website.
- The robots.txt file references the new XML sitemap with new URLs.
Your website’s XML sitemap gives you the opportunity to inform search engines about which pages you want them to scan and index, which is essential for SEO.
Make sure your new sitemap.xml:
- Contains the new website’s indexable URLs; exclude non-indexable ones
- Doesn’t include more than 50,000 URLs
- Doesn’t exceed 50 MB (uncompressed)
- Is UTF-8 encoded
You can use SE Ranking’s Website Audit tool to generate your XML sitemap.

Add a new site to the search console
If you’ve used Google Search Console or Bing Webmaster Tools for your old site, you must also verify your new domain. Otherwise, you won’t be able to monitor and manage your website’s search engine presence.
Read our full guide on how to add your new website to GSC.
Asking Google to reindex your new pages and content is also crucial. Using the URL inspection tool, you can do it manually if you only have a few new pages. The tool will inform you if your new URL is in the index after you enter it. If it’s not there, you can ask the search engine to re-crawl it.

The fastest and easiest way to inform Google about new website pages is to upload your new sitemap. This option works best if you have many of them. Upload your sitemap to your website’s root folder. Then, go to the Sitemaps report in GSC and click Add a new sitemap. Enter your sitemap URL and hit the Submit button.
Additionally, you should upload your new robots.txt file to the root of your domain and refresh Google’s robots.txt cache. To do this, navigate to the robots.txt Tester in GSC and verify that the latest version of the robots.txt file has been uploaded. Hit the Submit button to ask Google to crawl the updated version.
Change the address in the old site’s search console
Use the Change of Address tool in Google Search Console to smoothly transfer your old site’s Google search results to the new one. This is one of the website migration best practices because it notifies Google that your site has moved and minimizes the risk of losing rankings.
See some of the following situations where using this tool isn’t necessary:
- The website migrates from HTTP to HTTPS. Google can detect this change automatically without additional actions.
- You move a page to a different location within your site. This is not a website move, so a simple redirect will work.
- The website moves from www to non-www. Canonical tags or redirects would be the best solution.
- Your website migrates without visible changes to URL addresses.
Open the Change of Address tool in your domain-level property. It will automatically run several pre-migration checks. You must fulfill the requirements to proceed. If everything is okay, the migration will start, and you’ll see the notification on all sites involved, which will be there for 180 days.
Set up tracking and analytics systems on the new site
Utilizing website tracking and analytics tools is crucial for understanding your website’s performance and how users interact with it. It’s especially important to set up these tools during your website migration to assess how successful the move was.
Google Analytics is one of the most popular and free instruments for monitoring website performance. If you’ve already used it on your old website, it’s time to set it up for the new one.
Follow the steps described in our GA4 guide to get started with this tool.
We also recommend connecting GA with your project in SE Ranking if you want to be able to monitor everything in one place.
Run an audit and check for errors
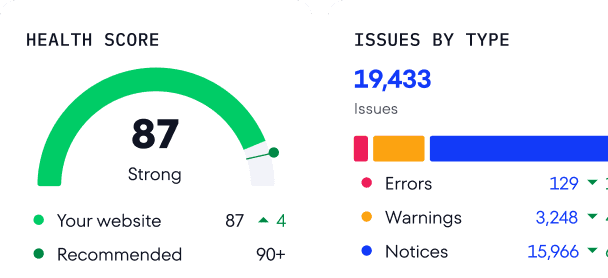
The next step is to check your new website for errors. Go to SE Ranking’s Website Audit tool and check your new website.

Go to the Issues Report tab to better understand your website’s problems. You’ll see here that all the issues have severity, description, fix recommendations and list of pages containing these errors.

Some of the most common issues that appear during the migration website audit include:
- Incorrect redirects
- Low server response time
- Sitemap issues
- Soft 404 pages
- Internal links
- Duplicate textual content
However, among all migration problems, indexing errors are the most critical and deserve special attention.
Tracking the indexing of new pages
Indexing issues require immediate fixes. Otherwise, your pages won’t reach the SERP and bots won’t be able to find them.
One common cause of indexing errors is the presence of blockers in the robots.txt file that prevent search engines from scanning and indexing pages. Be sure to update your robots.txt file to avoid this issue.
You can also use Google Search Console to monitor your page indexing status and diagnose any indexing errors. To do this, go to the Pages report under the Indexing section. Lower on the page, you’ll see a list of indexing errors on your site and the number of pages affected.

But remember that it can take time for Google to find and crawl your pages, so there’s no need to check indexing issues immediately after the move.
Another option is to use Issues Report and Crawled Pages within SE Ranking’s Website Audit.
- Go to the Issues Report tab and check the Crawling section. Here, you’ll see all the indexing-related issues identified.

- Go to the Crawled Pages and apply Filters to find any pages blocked from indexing.

Update links to your website and notify customers
Replace the old address with the new one so your customers can go to the new site. You should change your website address in:
- Your company’s social media profiles
- Google Business Profile
- Google Merchant Center
- And any other platform that contains information about your company, including its address.
Inform your customers of the new location:
- Write a social media post about the move that tells customers how to find your site at its new address.
- Launch an email newsletter with information about the move and the new website address.
Return to the old site when traffic drops
The migration process doesn’t end once your site is in its new location. Additionally, the main objective of this process is to move site traffic (and positions). That’s why you should monitor updates to both the old and new sites. Ideally, traffic on the old site should gradually decrease while traffic on the new site should gradually increase.

Unfortunately, things don’t always go as expected. The old site’s traffic may decline, but it’s possible that it won’t grow on your post-migration site for a long time.
Still, don’t panic and roll everything back right away. Instead, define benchmarks and look into some possible reasons why this is happening. Perhaps the redirect settings went wrong and the search engine couldn’t recognize them. It’s also possible that the new site was penalized for something. This can even happen due to algorithmic consequences.
You can also use additional tools to identify issues like the ones mentioned above, including:
- Website Audit, which checks the technical optimization of your website
- Competitor Research, which shows spikes and drops in organic traffic to give you an idea of how the numbers change after issues are fixed
- Keyword Rank Tracker, which monitors how your keywords rank and highlights position changes
Before you roll back a site migration, determine the cause of traffic loss. If you can’t figure it out for yourself, get in touch with experts in successful site migration who can either do it for you or pinpoint you in the right direction.
And even if that doesn’t work and your new site’s traffic still isn’t growing, you can always revert back to the old site while continuing to hunt for bugs. This will help you rethink your website migration strategy and ensure that the next attempt is more successful.
Conclusion
Migrating a website can have a significant impact on its performance and visibility in search engines. However, with proper planning, negative consequences can be avoided. If you decide to go this route, make this website migration guide your handbook and use our migration SEO checklist to help you move to a new domain successfully.